

Pie? Never made one. Tart? What’s the difference? Mousse? Seems complicated. Partner buys a can of pie filling on impulse? Well, I guess I have to find something to make.
In the past, I’ve tried to make things like chocolate pudding with mixed success. I always just used box mix before, so making something like a mousse made me really nervous. What if it doesn’t work? What can go wrong? I don’t even know all the ways a mousse can fail.
I intended to make this pie/tart/thing almost a month ago, but I’ve been putting it off. I bought ingredients, but they just sat there, taunting me. Finally, though, my backlog of other ideas ran dry, and I finally decided to just go for it.
After all, it’s a no-bake tart. Nothing in it can spoil, really. It’s not going to go bad. The absolute worst case scenario just means I have a mess of chocolate and fruit, and you know what? Maybe it wouldn’t be blog-worthy, but it’d be delicious.
Is It Pie or Tart?
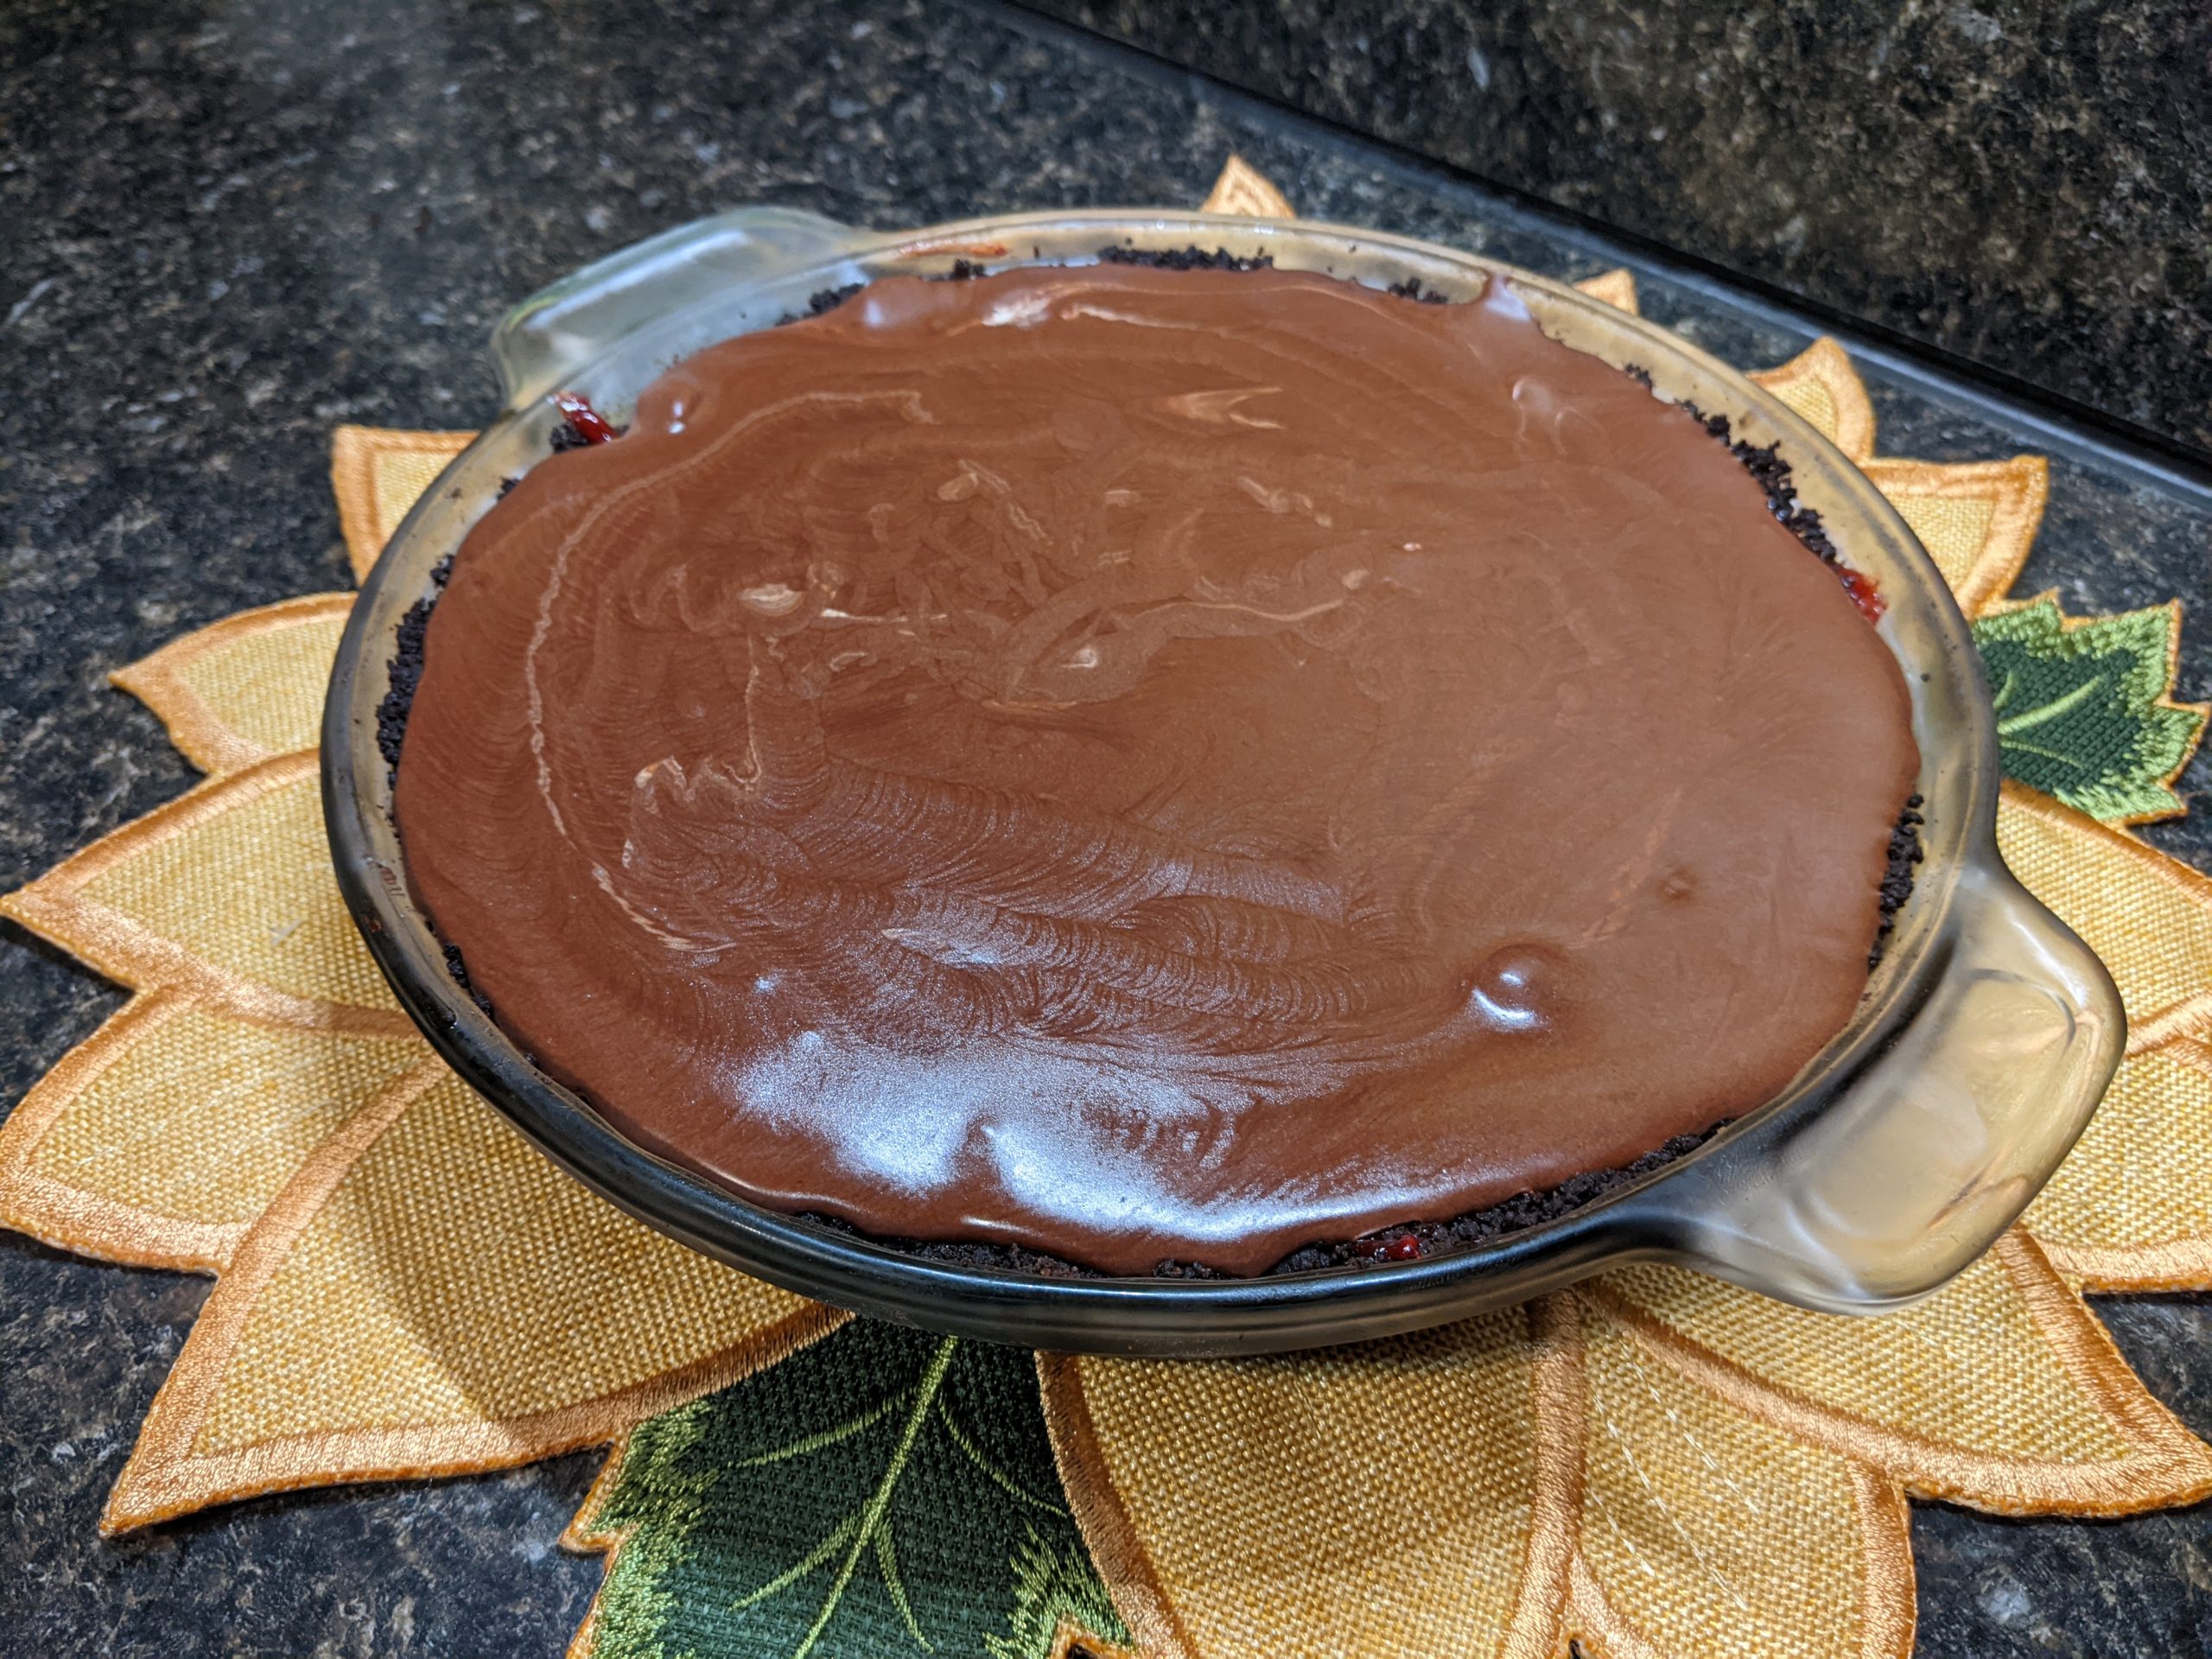
So, is this a pie or a tart? Well, I refer to it as a chocolate pie, but classical definitions label it a tart. It has a crumbly crust and no top layer of crust, which is mostly what makes a tart.
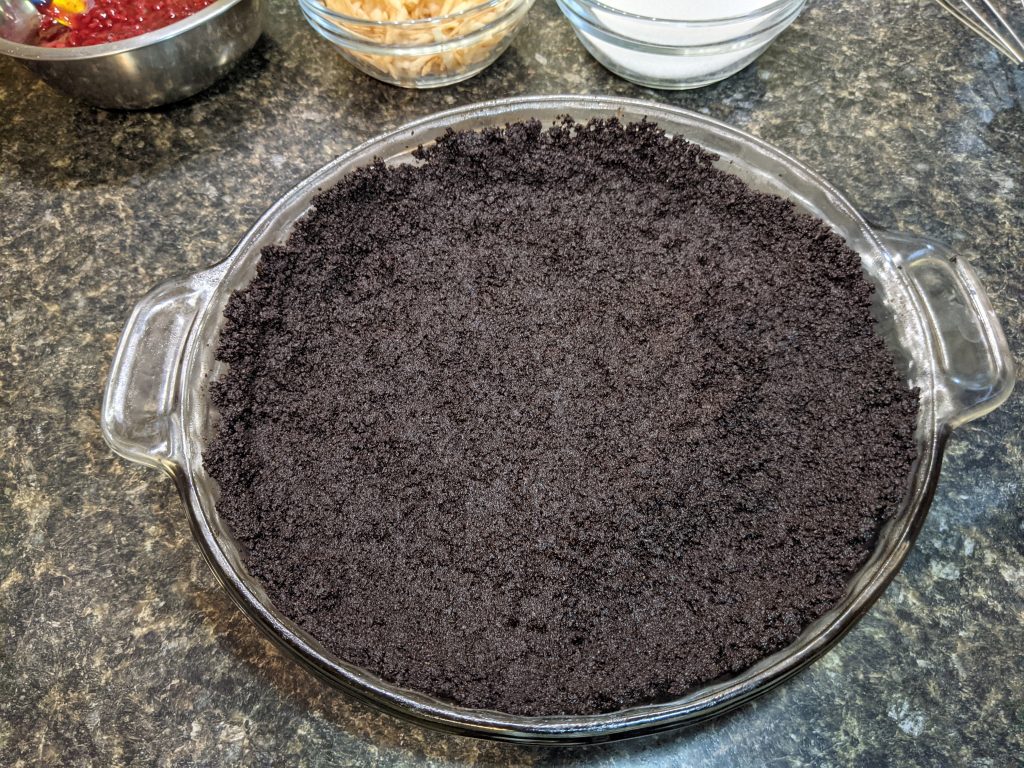
Of course, I don’t have a tart pan. A tart pan is a two-part pan; a rim to give the tart shape, and a bottom to hold it. When you want to serve it, you just hold it up and pop the side off downwards, leaving it nicely exposed for cutting. If you have a tart pan, I recommend using it. I used a pie pan, and, well, that’s why there’s no nice photo of a piece of tart on a plate. They came out kind of messy when I had to pull a slice out of a pie pan.
That said, a pie pan works fine! It just won’t be as easy to serve and it won’t look as nice, if those are concerns you have.
What Kind of Fruit?
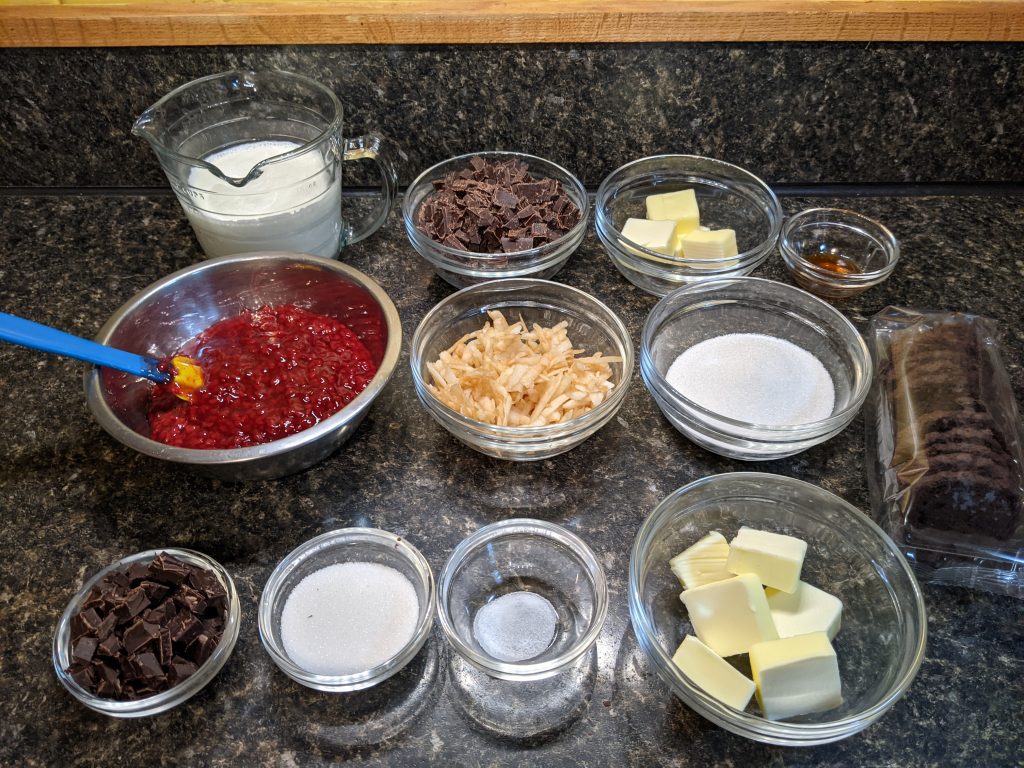
You’ll notice I have “fruit tart” in the title, instead of specifying what kind of fruit. That’s because you can use whatever fruit you want. For the one I made, in the pictures, I used raspberry. My partner loves raspberry, so that’s what he bought that led to this whole mess in the first place.
The recipe I based this on used cherry, and that’s fine too. In fact, I’m pretty sure I’m going to use cherry next time I made it. And there WILL be a next time, because it was really tasty.
I also used canned pie filling instead of making my own. Normally I’d make my own (and you may be able to use my compote recipe, modified to be a bit thicker) but this time I skipped that step.
You can probably even skip the fruit layer and make a mint creme to go in its place, I bet that would work too as a grasshopper mint tart. Oooh, ideas!
One thing that’s a bit unusual is that there’s apple in this raspberry tart. The apple adds some tartness and some texture to the otherwise sweet raspberry, and it works really well. I was surprised at the role it played. You can leave it out, but I recommend trying it, it’s quite good.
Happy Anniversary!
Hey, did you know this is the one-year anniversary of launching my blog? It’s true! It’s finally starting to pick up steam, and I’m getting a regular, if small, trickle of traffic every day. If you’re not one of my friends and family, say hi! Leave a comment, let me know what you like, or what recipes you’d like me to make. I’m always open to feedback and suggestions!
And if you’re friends or family, thanks for sticking around with my blogging experiment. It’s been fun, and a great incentive to experiment with more recipes I normally would never think to make. It’s made the pandemic much more bearable, too.
No-Bake Chocolate Fruit Tart
Equipment
- Tart Pan or Pie Pan
- Mixing Bowl
- Saucepan
- Rubber Spatula
- Stand Mixer
Ingredients
For the Crust
- 1½ Cups Chocolate Wafer Cookie Crumbs In a pinch, Oreo works once you remove the cream.
- 2 Tbsp Sugar
- ⅛ Tsp Fine Sea Salt
- ⅓ Cup Butter Cubed
- 2 Oz Dark Chocolate Chopped fine.
For the Fruit Filling
- 1 Cup Fruit Pie Filling
- ½ Cup Tart Apple Peeled and grated fine.
For the Mousse
- 7 Oz Dark Chocolate Chopped. I like 70% dark.
- 1¼ Cup Heavy Whipping Cream Divided; ¾ cup for mousse, ½ cup for whipping.
- ¼ Cup Butter Cubed.
- 1 Tsp Vanilla Extract
Instructions
For the Crust
- Crush cookies into crumbs if necessary. Add in the sugar and salt and mix.
- In a small sauce pan, over medium-low heat, start melting the butter.
- Once butter is melted, add in the 2 oz. chocolate and continue stirring to melt and mix. Keep the heat low to avoid burning the butter.
- Pour the melted chocolate into the crumb mix and stir until fully combined.
- Pour the crumbs into your tart pan and pat them down evenly across the bottom and up the side to make your crust. Put your crust in the fridge to chill for at least 1 hour.
For the Fruit Filling
- Peel, core, and grate your apple. You want it finely grated to add texture, but not leave large chunks.
- Mix the apple with the pie filling and set aside.
For the Mousse
- In a saucepan, over medium heat, heat up ¾ cup heavy cream until boiling. It will look almost foamy with small bubbles forming around the edges.
- Add in your remaining 7 oz. dark chocolate. Stir until it melts and mixes together.
- Add your butter, one cube at a time, stirring to mix before the next one is added. Once the butter is fully mixed in, add in your vanilla extract.
- Using your mixer, beat the remaining ½ cup cream until it forms soft peaks.
- Carefully fold the whipped cream into the chocolate-cream mixture until well combined. Be gentle so you don't beat the air out of the whipped cream.
To Assemble
- Spread your fruit filling evenly over the top of the crust.
- Spoon your mousse over top of the fruit filling, using a spatula or knife to smooth it out.
- Return to the fridge to chill for at least two hours to set and solidify.
- Once chilled, serve and enjoy!
Congrats on 1 year anniversary!
Thanks Tex! Here’s to another one.